Flows
Flows allow you to control how an AI Agent/app processes user inputs and responds during conversations. Instead of relying only on general instructions sent to the language model, you can build structured flows that are step-by-step interaction paths designed for specific tasks or scenarios.
Flows are individual conversation paths that are designed to handle specific tasks. With flows, you decide exactly what your AI agent should ask, when it should collect data, how it should make decisions, and what actions it should perform (like calling an API). This results in more reliable, consistent conversations and better control over outcomes.
Workflow driven vs Instruction driven
AI Agents can follow general instructions or structured workflows. An agent becomes workflow-driven when an active flow is assigned, and will use the flow’s logic to manage conversations. When no flows are used, the AI agent solely relies on the instructions/prompts that are being fed. These instructions along with the data sources you have configured act a general guide to shape the tone, role, and behavior. The limitation with this approach is that complex, multi-step instructions may not always provide the best results. Complex language-based instructions may be misinterpreted and the responses from such interactions can be unreliable. For example, an instruction-driven approach may not work best in a multi-step use case where you are trying to collect a name, verify an address, and then call an API.
When you create flows and assign one to your AI agent, inputs are first evaluated against the steps in a flow to determine how progress should be made. The flow takes control, guiding the conversation through a series of structured predictable steps, such as:
- Displaying messages
- Collecting information
- Performing API calls
- Applying logic
- Looping through data
General instructions are still passed to the language model, wherever relevant, but the flow dictates the overall process.
Example scenario: Generate a quote for a service.
Instruction-Driven:
User: “I need a quote for XYZ service.”
Agent (LLM following instructions): “Sure, I can help with that. Could you give me your address?”
There’s no certainty that the agent will then ask for products, verify services, or present offers in the right order.
Workflow-Driven:
In a workflow-driven approach, you can design a flow with specific steps so that when the following interaction takes place, the outcomes are better.
User: “I need a quote for XYZ service.”
The system matches this input to the flow you have created for generating relevant quotes.
The flow:
- Displays a greeting.
- Collects an address via a form.
- Calls a qualification API.
- Presents available services in a table.
- Collects service selections.
- Loops over each selection for offer details.
- Presents the final quote.
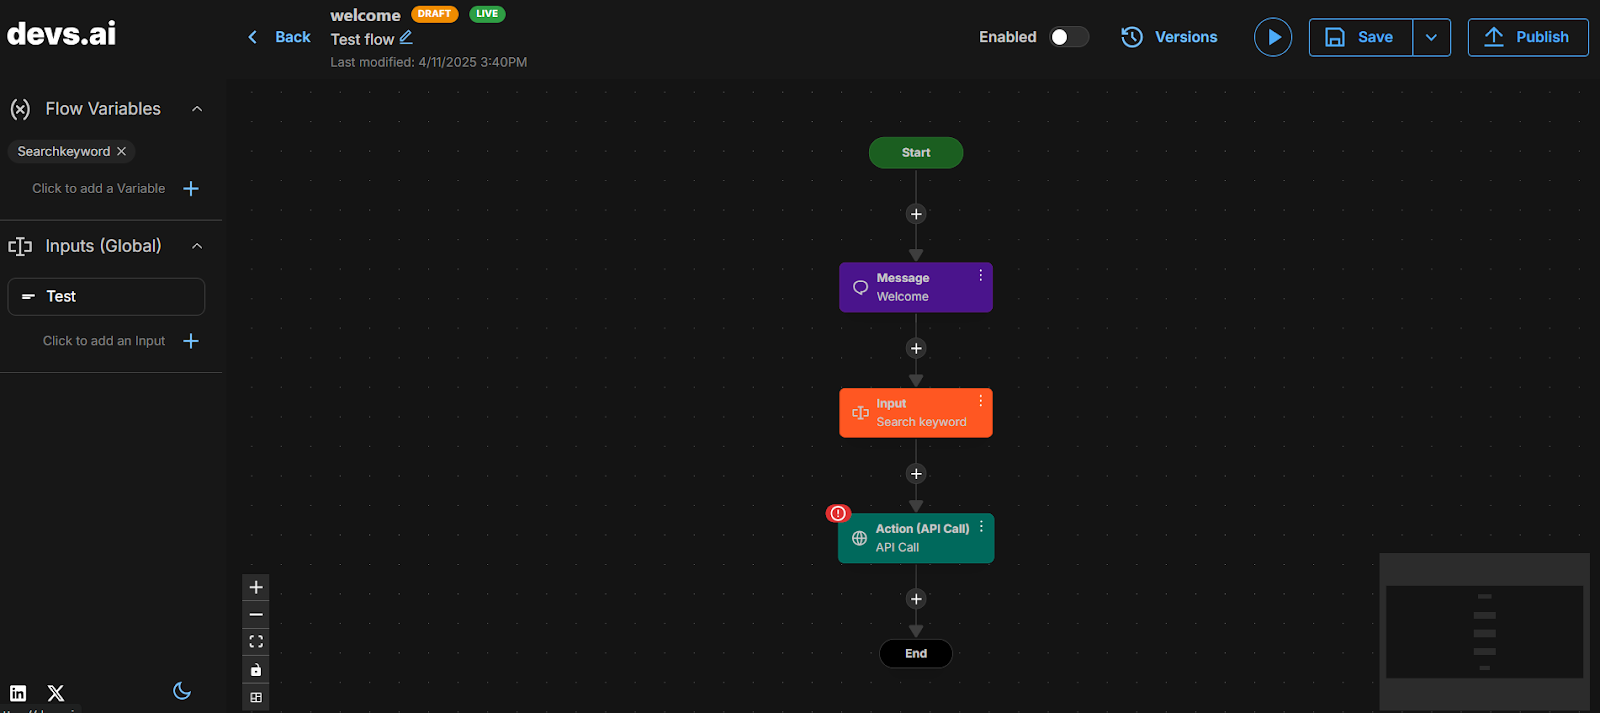
Designing a flow
Flows are designed by adding and arranging ‘nodes’ in a canvas-like visual area. This interface lets you build the logic for your flow step-by-step, using drag and drop tools.
Flow name and description
At the top of the page, each flow displays its name and a description. You can set both when you create a new flow. Add a short description that captures the purpose of your flow. The flow description plays a key role in the selection of the flow during a conversation. The platform uses this description to match user inputs with the most relevant flow. Use clear, intent-based language so it accurately conveys the flow’s purpose. For example: This flow handles quote requests for subscription plans.
To edit the description at any point, click the pencil icon.
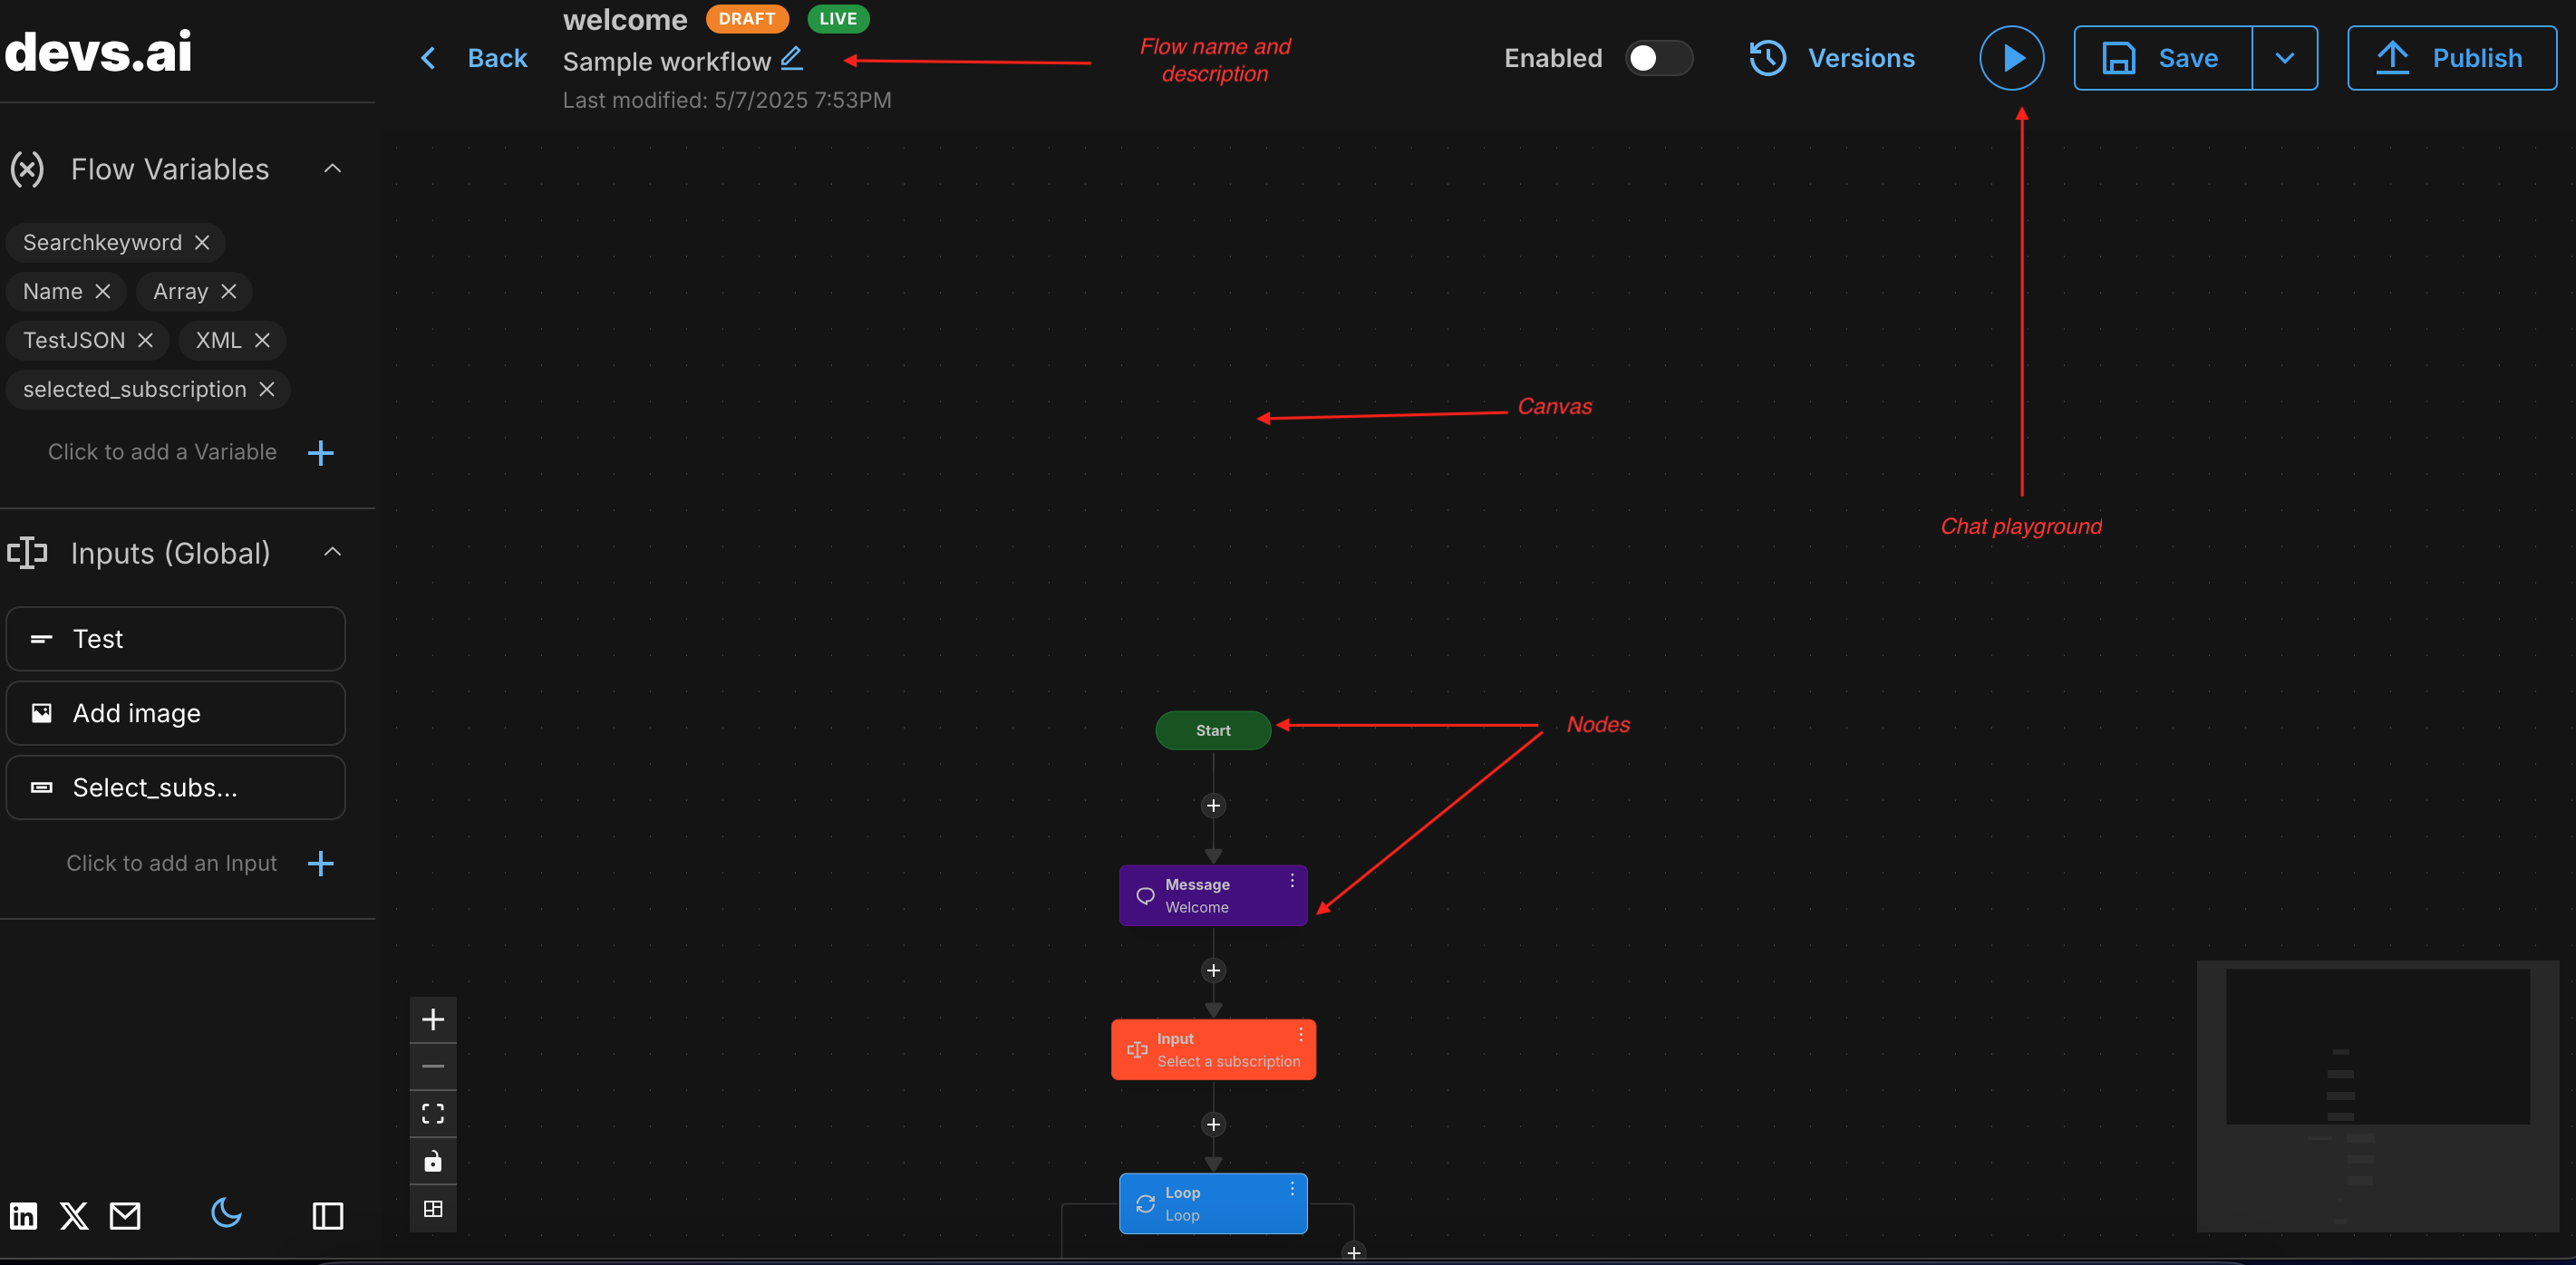
Navigation
Click and drag your flow or individual nodes to move it around the canvas. Use your mouse to zoom in and out of the canvas as you like.
Adding nodes
Click the + button on any connector line to add a new node to your flow. You can choose from different types of nodes, such as, input, collect, logic, and so on. It is important to note that each node is executed independently. The underlying language model does not have any understanding of the overall flow structure, other nodes, or variables. You must provide clear, self-contained instructions within each node that describe exactly what the model needs to do.
Arranging nodes
Once nodes are added, they can be dragged and dropped across the canvas to rearrange them according to the workflow you are trying to build. Nodes are connected with each other using connector lines. Some nodes like logic nodes have multiple branches.
Editing nodes
Click on a node to open its configuration panel on the right. You can update the model, set prompts or instructions, assign variables, and customize other inputs relevant to that node.
Deleting or cloning nodes
To delete or duplicate a node, click the three-dot menu on the top right of the node. From the menu, select Delete to remove the node, or Clone to create a copy with the same settings.
Versions
Versions allow you to work on updates without affecting the live or published flow. Click Versions to view the complete version history. You can roll back to a previous draft or export versions from version history.
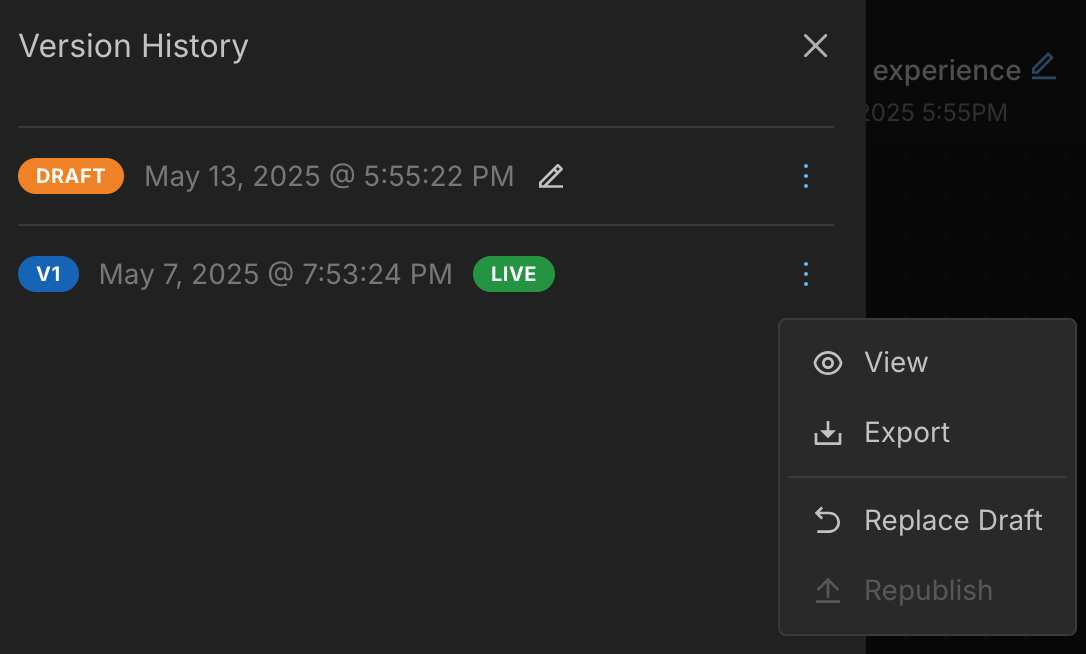
Any changes that you make to a flow are saved as a draft. A draft version is editable and can be tested, but it is not yet live for other users. You can continue to make changes, test, and update nodes in ‘draft.
When you are ready to promote a draft to ‘live’, click Publish. This locks the current draft into a published version. Published versions are read-only. You cannot make any changes to them.
Chat playground
The ‘play’ button on top of the page opens the Chat playground. This is a built-in testing environment that allows you to simulate how your flow behaves during a real conversation without needing to actually deploy it. Chat playground helps you to test how flows respond to different inputs. You can use it to validate node behavior and identify any errors before publishing a flow.
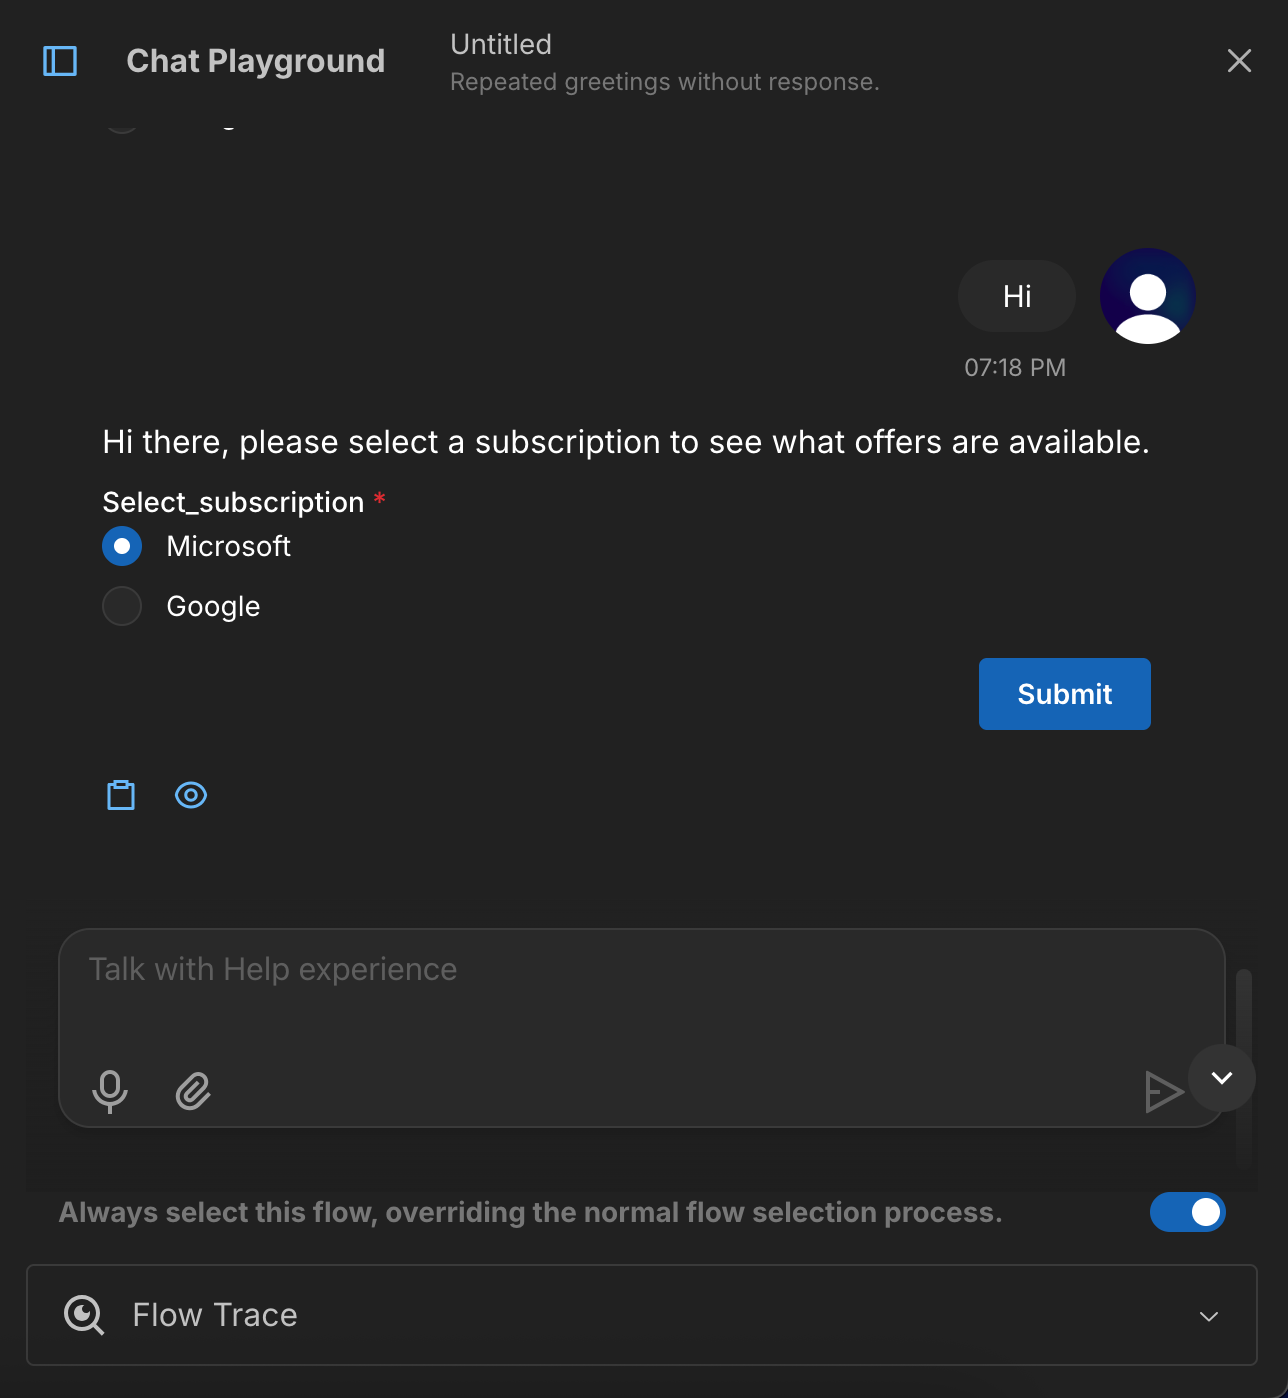
Click on the play button to start the simulation. Enter a user input just like in a normal conversation. The system will try to match the input to the description of the flow and move through the different nodes contained within. Note that this behavior only applies when the toggle for always selecting the current flow is turned off.
Use the toggle in chat playground to always select the current flow directly. Click Flow Trace to view a detailed, step-by-step view of how the flow was executed. You can view how variables are captured, how conditions are evaluated, and how responses are generated. Use this data to debug flows.
Saving, exporting, and importing
Click Save on top of the page to save changes to your flow. Flows can be exported or imported as JSON files for backup or sharing, and imported to other AI agents. When you import a flow, it will replace the current draft. After importing, ensure that all configurations are in place. Test imported flows before publishing them.